Water transfer printing (hydro dipping)
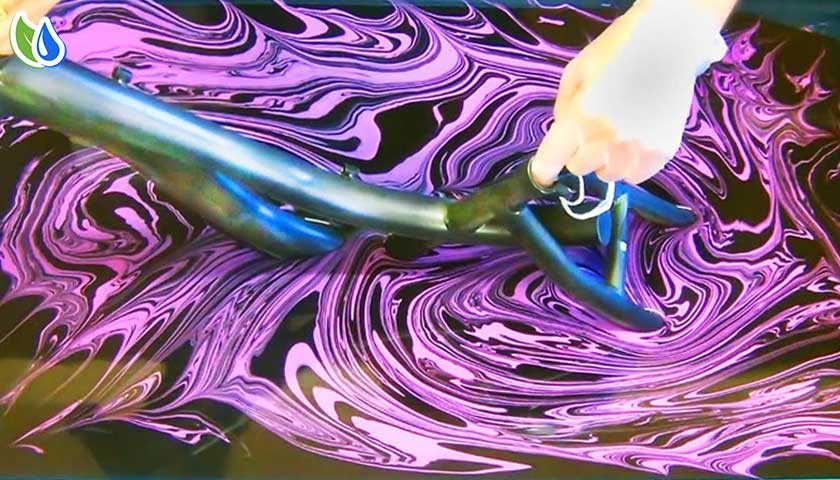
Water transfer printing, also known as immersion printing, water transfer imaging, hydro dipping, watermarbling, cubic printing, Hydrographics, or HydroGraphics, is a method of applying printed designs to three-dimensional surfaces. The resulting combinations may be considered decorative art or applied art. The hydrographic process can be used on metal, plastic, glass, hard woods, and various other materials.
History
The exact origin of the water transfer printing process is unclear. However, the first hydrographic apparatus registered for a US patent was by Motoyasu Nakanishi of Cubic Engineering KK on July 26, 1982. Its abstract reads, “printing apparatus provided with a structure which supplies a transcription film into a transcription tub containing a liquid so that the transcription film is kept afloat on the liquid, a structure which makes the liquid flow in a direction in which the film is supplied, and a structure which slantingly immerses an article to be printed into the liquid in the transcription tub from an upstream position to a downstream position of the liquid.”
Usage
The water transfer printing process is extensively used to decorate items that range from entire all-terrain vehicles and car dashboards, to small items like bike helmets or other automotive trim. Films can be applied to all types of substrates including plastic, fiberglass, wood, ceramics, and metal. For the most part, if the item can be dipped in water and can be painted using traditional techniques then the hydrographic printing process can be used.
Process
In the process, the substrate piece to be printed first goes through the entire painting process: surface preparation, priming, painting, and clear coating. Depending on some types of plastics, some substrates may also need to be flame treated before a base coat is applied. A PVA hydrographic film, which has been printed on with a desired graphic image using latex or pigment-based inks, is carefully placed on the water’s surface in the dipping tank. Recommended water temperature for the dip tank is 90° F (32° C).The clear hydrographic film is water-soluble and should dwell on top of the water for 60-75 seconds before spraying with activator solution. Safely using a fitted respirator, the film is then sprayed with an activator solution to dissolve the film and return it to its fluid state. Using a dipping is begun, the surface tension of the water will allow the pattern to curve around any shape. Any remaining residue is then rinsed off thoroughly. The ink adheres to the desired surface and it cannot be washed off easily. It is then allowed to dry.
The adhesion is a result of the chemical components of the activator softening the base coat layer and allowing the ink to form a bond with it. One of the most common causes of a failure to achieve adhesion between the two layers is a poorly applied activator. This can be either too much activator being applied or too little.
What Is Hydro Dipping?
Hydro dipping is a way to transfer graphics to objects without expensive printing equipment or paint. The process works by placing a special film on the surface of the water. A chemical solution is sprayed onto the film, which causes the film to dissolve into the water. The pattern adheres to any object that you submerge in the water.
DIY hydrographic dipping has several advantages over other techniques:
☔ Hydrographic kits include all the items you need
☔ Complete coverage with the pattern, including small openings and crevices
☔ Customizable designs or patterns
☔ Works on most materials
☔ Objects can be small or large
How Do You Hydro Dip?
When you have a complete hydro dipping kit, the process is easy and fun. You can use the patterns that come with the kit or have a custom pattern applied to the film. You fill a container with water and lay the film on the surface. When you spray the film with the chemical solution that comes with the kit, the film/pattern dissolve into the water. After this, you immerse the object in the water and remove it is completely covered with the pattern from the film.
Step-By-Step Guide to Hydro Dipping
Items that you will need for your DIY hydrographic printing projects:
☔ Large, deep plastic container (the container will have paint on the inside after the hydro dipping is complete)
☔ DIY complete hydrographic printing kit
☔ Object to be dipped
☔ Sandpaper to smooth the surface
☔ Rags
☔ Bucket of mild cleaning solution and water
☔ Vinyl, rubber, or latex gloves
☔ Primer Coat
☔ Base coat
☔ Top Coat – Clear Coat
What is the purpose of hydro dipping?
Hydro dipping (also known as immersion printing, water transfer printing and hydro imaging ) is a unique process that allows you to apply graphics to almost any three-dimensional object. This process has been used for years in the auto industry along with many other fields.
Average Costs for Hydro Dipping
The average cost for hydro dipping a wheel for a vehicle is roughly $150, and that pricing can vary by as much as 20% – 50%, depending on the type of activator, finish, and labor costs. Hydro dipping fees for guns typically range from $200 to $500, depending on the make and model.
Can you Hydro dip at home?
While there are many companies specializing in hydro dip art for large items (e.g. cars and sports equipment), it’s possible to do the process on your own and be creative. Purchase a home hydro dip kit online to apply a design of your choice, with minimal equipment or experience.
Is Hydro dipping just water and spray paint?
Now to the fun part! You can use about any regular acrylic spray paint – Hydro dipping is a great chance to use up old spray cans. Spray generously onto the water. Add sprays on different spots of the water’s surface to create intricate patterns.
BEST of HYDRO DIPPING Videos Compilation ??
What does hydro dipping do?
Hydro dipping (also known as immersion printing, water transfer printing and hydro imaging ) is a unique process that allows you to apply graphics to almost any three-dimensional object. This process has been used for years in the auto industry along with many other fields


